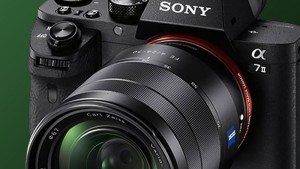
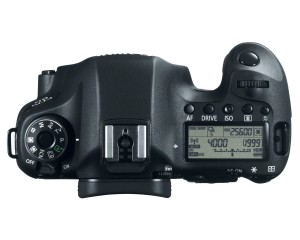
 Our post on shooting video for the Canon 6D generated a lot of conversation and questions, so I wanted to follow up and go into some greater detail. Now that the Canon 6D is a year old, I think we all have a better understanding of how it fits in the Canon full-frame DSLR lineup, relative to the 5D mark II and 5D mark III. I know this post is epically long… but I’ve learned a lot. Feel free to skip to the relevant parts for you!
Lately, when I’ve had the choice of either a Canon 5DmkII or a Canon 6D to take on a video-only shoot, I’ve been taking the 5DmkII. Yes, even though the camera is more than twice as old as the 6D, it is simply easier to use for video. The 6D does have some advantages, namely better low-light performance, much improved low-light focusing for photos, wifi and GPS. While those things are great if you’re using the camera for stills, or want to be able to share pictures on the fly, they don’t get used much by video shooters. Of course, now that so many video shooters have realized they want a 5D-series camera over the 6D, the 6D camera price has dropped considerably and used 5DmkIIs are selling for oddly high prices. So the value equation keeps shifting. If you’re buying a camera for photo and video, I think you’ll get the best value sticking with the 6D. If you’re just a video shooter and you can find a 5DmkII for under $1800, that’s probably the way to go, especially if you want to experiment with the raw video hack in Magic Lantern.
Magic Lantern is still in beta for the 6D. It will crash from time to time. It is, however, better than not shooting with ML. Unless your camera crashes at that critical moment. That’s the excitement of event work, right?
Without Magic Lantern, the 6D is really just a still photography camera. ML is still in development for the 6D, but you can use the dev kit to install an early alpha version and at least get basic exposure and focus assist features. This is a huge help when shooting video.
I had my first really bad experience with moire after my last blog post on the 6D. It was bad, really bad, terrible moire. I interviewed a lawyer and his jacket just went nuts. It wasn’t a patterned jacket, but the fibers in it must have been the perfect size to cause trouble. I didn’t notice it in the display, of course, but I probably spent three hours in After Effects filtering, blurring, and mapping something, and then digitally zooming and cropping to make the area less noticeable. It was chroma, it was luma, and it’s some of the worst I’ve ever seen. After the fix, the client never said anything, but I’m super nervous about it now. The 5DmkIII’s 3×3 pixel binning really solved this problem, and hopefully the 6D is the last full-frame camera Canon makes that uses line-skipping for video.
Since my bad moire experience, I’ve been shooting 6D interviews and “brick wall” type shoots with a Tiffen HDFX 1 filter, and I haven’t noticed a problem. I tried one of the in-camera OLPFs (optical low-pass filters) but it makes me nervous popping one in and out of the camera body like that, and it only works on medium to long lenses.
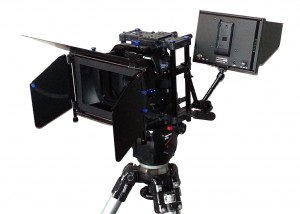
The big question I get about DSLR shooting (whether it’s the 6D, 5Dmk3, or a crop-factor camera) is “what accessories are worth it?” Of course, the answer depends on what you’re shooting, if you have an assistant, and your own personal style. I tend to take my cameras out in one of three basic configurations.
Suggested Configuration #1: Cinema Style
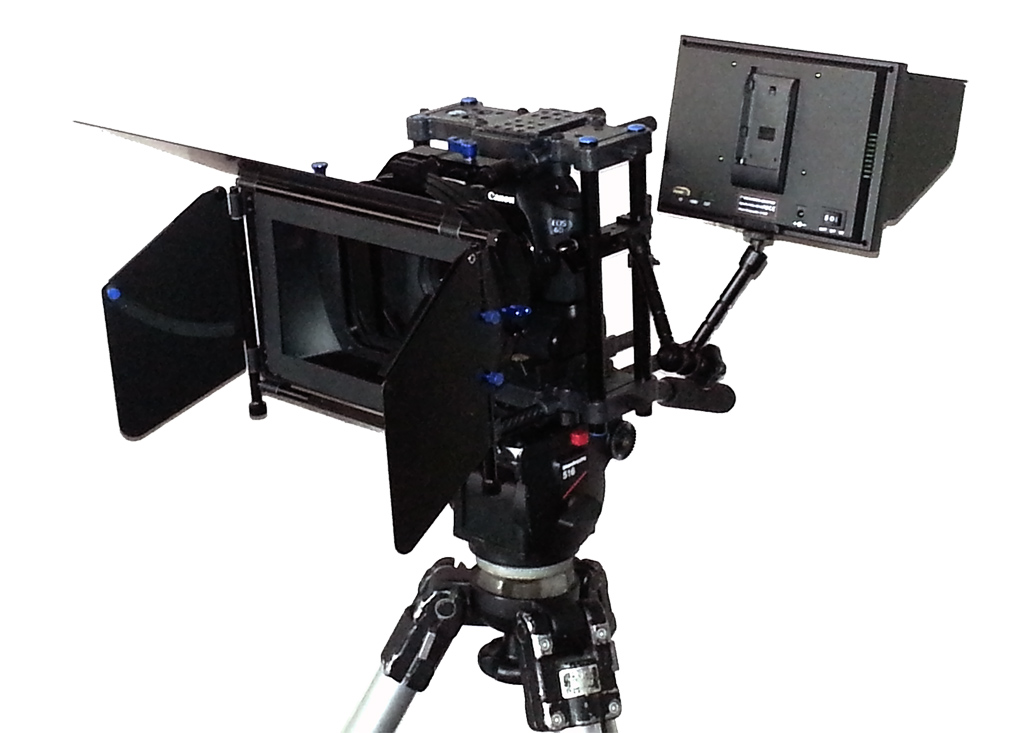
If you’re shooting something narrative, and you have an assistant camera person, you can really dress the camera just like you would a Red Epic or Arri Alexa. I suggest a cage, rails, mattebox with filter trays, followfocus with whip, monitor (ideally HDMI in and SDI out), and a nice set of NDs, ND grads, and a polarizer. Put it on a heavy duty tripod and head, get a shoulder mount and handle for the cage, and add your choice of lenses with focus gears, and you can take it pretty much anywhere.
Now, if you’ve done that, you’ve eliminated most of the advantages of shooting with a DSLR in the first place. You’ll need an AC for changes, shoulder-mounting gets heavy, and moving quickly is almost impossible. You do get beautiful fullframe video on a budget, and you get to make the camera look pretty respectable. It’s still a DSLR, though, so you should either have great control over your lighting or be shooting with the 5DmkIII’s raw hack. Spending an extra $80 for a light kit rental will do a lot more for your image than covering your camera with hardware.
Audio for this kit is second-system only. Slate is optional, depending on your post-production style. The terrible in-camera audio should be enough to get sync with a program like PluralEyes, even without a slate.
Usually, the lenses for this kit are primes. If I were going to pick three, I’d take our 28mm f/1.8, the Zeiss 50mm f/1.4 Planar T*, and the Rokinon 85mm T/1.5. Adding something on the wide end, like our 20mm f/1.8, and something with a bit of reach, like the 105mm f/1.8, fills out a prime kit nicely. If shooters add zooms, they usually start with the 70-200 f/2.8L IS or the 24-105mm f/4L IS. The IS is great for shoulder-mounted shots.
Suggested Configuration #2: Run and Gun
DSLRs offer a key advantage over cinema cameras like the Red Epic and ENG-style cameras like the Sony PXW-Z100. They are tiny. You don’t need a massive Sachtler head and sticks, or huge counterweights on your jib arm. They are so light, I’ve actually taped them to things when I needed to get the shot. If you’re shooting doc style, your kit should be three things: small, steady, and easy-to-use.
A shoulder rig is very important, since you often won’t have time to set up your tripod shots. I built a frankenrig out of two different shoulder rigs from one of those nobody brands on Amazon. I found a way to combine the rear counterbalance weights, my preferred handles, 15mm rails, and my preferred 1/4″ mount all into one rig. I suggest not going with a full cage, since that just adds bulk and takes up your hot shoe. I added a few mounting blocks to the long 15mm rail so I have a place to mount a monitor arm or sound recorder. I have seen people try to mount their wireless microphone receivers onto their shoulder rig. This is just silly! Get a shoulder bag and put your audio recorder in it, and run your wireless receivers up the shoulder strap. Trying to balance the extra weight above your eye level all night is exhausting. The only audio gear I put on my shoulder rig is a videomic pro in the hot shoe.
Get a lightweight tripod. Manfrotto’s carbon fiber legs are pretty affordable, and combining it with a 701-size fluid head should be good for most shoots. Sometimes, I end up mounting the baseplate on the bottom of the shoulder rig, so I don’t have to deal with screwing and unscrewing plates all night. Sometimes I put a manfrotto-compatible base on the shoulder rig’s camera plate, but this messes up the height of the rails, so I need a rails offset if I want to use a followfocus. I shot for years without a follow focus, but I get MUCH better results with one. I use the D Focus v4, although FFs are a very personal choice, and you should experiment with a few to know what you like before you buy one.
Since your run-and-gun kit can’t include a matte box, you’d better have some screw-in filters. If you only get one, make it a 4-stop ND or variable ND. Your second filter should be a polarizer. If you can get a ND kit, great, but remember you need to drag it around with you and stop to change filters as needed.
The first lenses I take out with this kit are usually zooms with IS. Since I usually can’t set up shots, it’s nice to be able to make focal length adjustments without changing lenses. I consider image stabilization basically mandatory for DSLR video shots handheld at longer than 50mm. I usually shoot with the 24-105mm f/4L IS, but some shooters I know sacrifice the telephoto end for an extra stop of light with the 24-70mm f/2.8L IS. I prefer to have lenses for handheld and lenses for dark places, rather than the f/2.8 compromise on an IS zoom lens.
If you’re shooting with more than one shooter, a lot of this lens advice can go out the window, since you can mix and match a few different lenses on each body and get a really full set of options and coverage. If you’re shooting in cramped spaces, forgo the stabilization and take something fast and wide. If I were shooting in a car, for example, I’d probably take a Sigma 20mm f/1.8 and the 50mm Zeiss Planar T* f/1.4. A 35mm f/1.4 Rokinon would be a great option for night vehicle interiors.
Raw video at this level of production is silly. Just expose well, shoot flat, and get it right. Trying to handle a terabyte of data from a single shoot day doesn’t make sense without an AC and DIT.
A lot of videographers spend their whole lens budget on a “do-everything” lens like the 24-70mm f/2.8 IS. I think this is a mistake. You can shoot almost anything on that lens all day long, yes, and you’ll get a solid B+ in the image category. But you’ll get much better results from choosing a lens that fits your specific needs for a particular shoot. 24mm is wide, but it’s not iconic like a 20mm. 70mm is okay for portraits, but you’ll wish you had more reach. f/2.8 isn’t slow, but indoors, you’ll still be wishing you had more. For the price of that one lens, you can get a kit of photo primes plus the 24-105mm f/4L. Unless you simply can’t bring the extra lenses with you, the 24-70 is the jack-of-all-trades lens that can make you complacent.
Suggested Configuration #3: Guerrilla Filmmaking
You can’t take a matte box outside of the TMZ without getting some stares. People are fascinated and intimidated by the moviemaking process, and usually, this makes it harder. There are some places where getting permission is impossible, but almost no one will stop the tourist with a camera. Want your documentary crew to follow your subject on Amtrak or an airplane? Good luck! If you’re shooting in a foreign country, you may be expected to pay “fees” (bribes) to get your gear through customs or security checkpoints, and shiny new equipment tends to disappear when you’re not looking. The less intimidating your equipment looks, the better.
If what you need is the smallest possible camera you can intercut easily with a full-frame DSLR, Canon’s new SL1 (100D) is the hands-down best choice. The 1.6 crop factor is a small tradeoff for the teenie-weenie camera body. With a 40mm pancake on it, it could be mistaken for a point-and-shoot. Everyone will assume you’re a camera-happy tourist. Put some dirty gaff tape and an old strap on it, and you’ll look like you’re shooting on a Rebel from 2001. This only works if you put it in a junky bag and don’t wear anything flashy.
If you’re somewhere where someone really doesn’t want you to be, consider a camera with dual media. You may be able to hand over the SD card in your 5DmkIII, and still walk out the door with the CF card. In the “old” days of tape, shooters using the HVX200 would turn over their DV tapes to authorities, even though the camera was recording to P2 media. I’ve been asked by an armed US soldier to turn over my media before, and it’s a scary feeling. It takes some real guts to lie to a guy holding an automatic weapon.
If you need the full-frame (and I’m pretty sure you don’t, but that’s a discussion for another post!), the 6D is a relatively small camera. Without a battery grip, and with a few small lenses, you’ll probably be able to shoot on public transportation, at events, etc. without drawing a crowd or raising suspicion. Since you’ll want to skip the shoulder mount, though, make sure your lenses are either really wide or IS, and run sound from a wireless lav to a recorder so you don’t have to keep it visible. Sound gear is a lot easier to hide, and usually sound is the most important part of doc-style shooting. Zoom H1s go anywhere, fit in pockets, and can connect to wireless lavs like the Sennheiser G3.
Camera support tends to become a very personal decision at this point. I like to bring a gorillapod, since it’s versatile but not big. Bringing a “real” tripod will always get some attention, but you may decide it’s worth the trade-off. Manfrotto makes a few super-portable photo tripods that can fit in a backpack. A shoulder rig can be tough to travel with, and usually gets some stares, too.
Lens-wise, the 40mm f/2.8 pancake is about as small as lenses get. The plastic 18-135mm f/3.5-5.6 is less intimidating than any L-series lens, and has a lot of versatility (and image stabilization). If you want a second prime, I’d suggest either going for the 85mm f/1.8 if you’re shooting on a full-frame camera, or pairing Canon’s 28mm f/1.8 and 50mm f/1.4 on a crop factor camera. Some of your choice of lenses will depend on the time of day, the style of the piece, and your personal tastes. Definitely try a few lenses out before committing them to a long trip.
What have you learned in the year that the 6D and 5DmkIII have been available? Share your experiences in the comments!
Posted by Jon Kline
