You know lighting has a huge impact on how people look in photos and video. But sometimes adding lights is complicated, expensive, or just plain impossible. Using available light isn’t just the “easy” way out, sometimes it’s the most effective. In this series of posts, we’ll talking available lighting. Tool number one: bounce light.
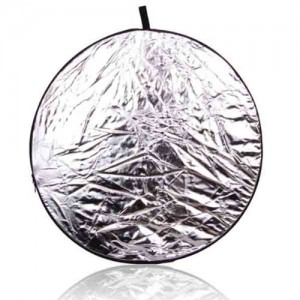 You’ve probably seen a photo/video reflector (sometimes called 5-in-1s, collapsible circles, flexi-fills, or multi-discs) on a photo or video shoot before. You may have also seen more professional reflectors, like shiny boards, or budget-friendly options like beadboard, foamcore, or even aluminum foil. These are all different ways to bounce available light. Some are expensive, but you can find a basic photo/video reflector for under $20.
Why to use bounce light
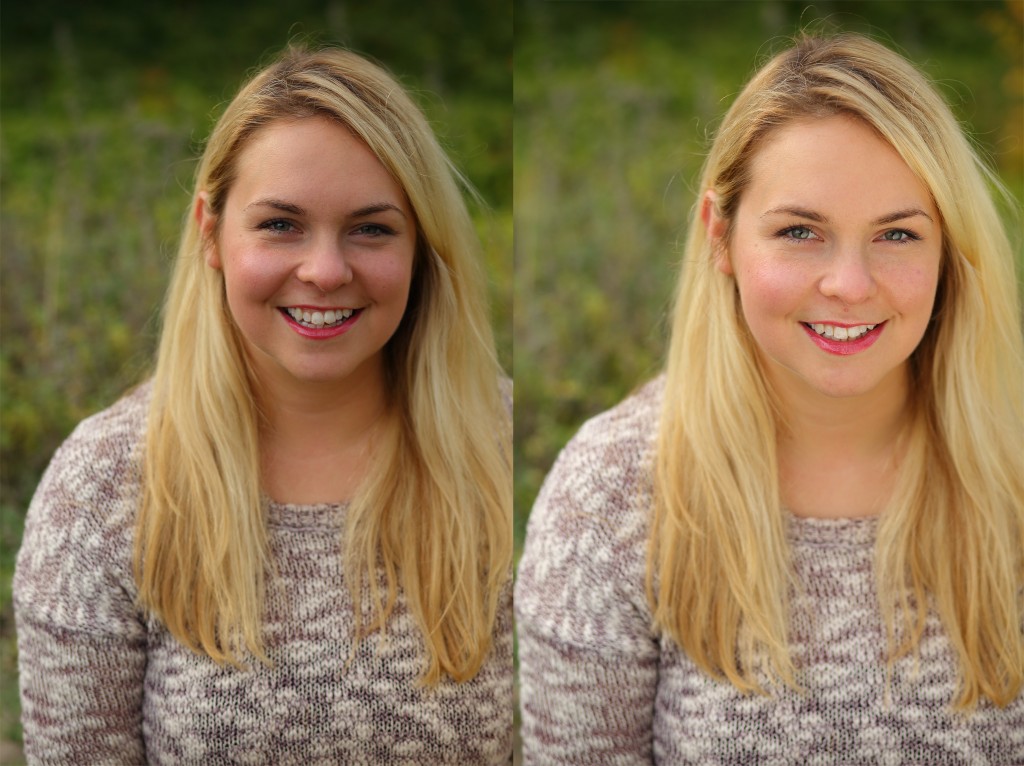
Bounce light can do a few things very well. When used as a fill light, it can soften wrinkles and make skin more even. It can create a catchlight (eyelight) that makes eyes appear more alive. It can also help control contrast, especially when working in direct sun. These are all ways to make the subjects of your video and photos look more attractive.
When to bounce light
I often use bounce light both outdoors and inside. When shooting outside, it can be challenging to choose the background you want while still putting the subject in flattering lighting. Three-point lighting is often the goal, but the sun usually gives us either two-point lighting (the direct sunlight and the sky) or one-point (under clouds, where everything is even and the light is soft, but flat). Adding a reflector is adding another light source, giving you more tools to flatter your subject and move the lights to where you want them.
What to bounce with
There are about seven bounce surfaces I use on a regular basis. The most basic is a white card or fabric. This type of bounce is great for the fill side of the face when the key is in direct sunlight. The diffuse light will soften shadows and reduce contrast. It’s also the surface I use most often for bouncing artificial lights.
Another popular white surface is bead board, sometimes called platypus. This is white styrofoam sheets, often used as building insulation. Bead board tends to be softer and more flattering than a white card, but the effect is similar. In my opinion, the greatest advantage of bead board is that it holds up well in water. I’m not just talking rain, either. Water rolls right off, but it floats, too. It’s great for fill when you’re shooting in a small boat or other watercraft.
Another common bounce surface is silver. This is a semi-reflective fabric surface that gives some directionality to the light. If your source is a hard light, it will create shadows, although they will be a bit softer than direct sunlight. If your light source is very soft, like an overcast sky, the bounce will be very soft as well. Silver is great as a key light on extremely overcast days, since you can add contrast where there otherwise wouldn’t be. You’ll need to be very close to your subject.
Many reflectors include a gold side. The end result is much like silver, but the color of the light is warmed. Using the gold side allows you to vary the color temperature of your light sources without needing to use gels or other methods. Gold is a great tool to have on a mostly overcast day, especially for particular skin tones. Many people with very light or very dark skin can look great under a warmer-looking key or fill source.
Some reflectors are gold-silver combo. They are usually arranged in a fine zebra pattern. When gold is too warm, but silver is too cold, this is the perfect option. This usually works great for fair skin and on days when the sun is partially hidden behind haze.
Shiny boards are a standard 42″ square, and have a flat surface with a foil-like covering. They bounce light much more directly, and are great for using over longer distances. If you need a direct light indoors, away from a window, you can set a shiny board outside and direct light down a long hallway or into a deep room. Shiny boards are also commonly used with an additional bounce or diffusion, and can make it look as if sunlight is coming from 3 or more directions at once. They are usually mounted on heavy-duty stands. You can improvise your own shiny board by taping aluminum foil to a hard surface like a foamcore card.
Mirrors are the ultimate bounce. I usually don’t use them to light people. When I want a very precise line of light on my background, or there is simply not enough space to get a light where I want it, a mirror is a useful tool. Covering a mirror with clear tape and breaking it allows for a nice breakup, throwing random-looking slices of hard light (please be careful when intentionally breaking mirrors).
Other common bounce surfaces include bleached muslin, unbleached muslin, and supersoft bounce. Each has unique strengths, depending on the application.
How to place your bounce
Usually, three-point lighting is a good starting objective. You can use direct sunlight as your key or as your backlight. If you don’t have direct sunlight, you can use the cloudy sky as your fill and a shiny surface close to the face as your key. Under haze, you can usually use the sun as key, fill, or backlight, depending on what you need.
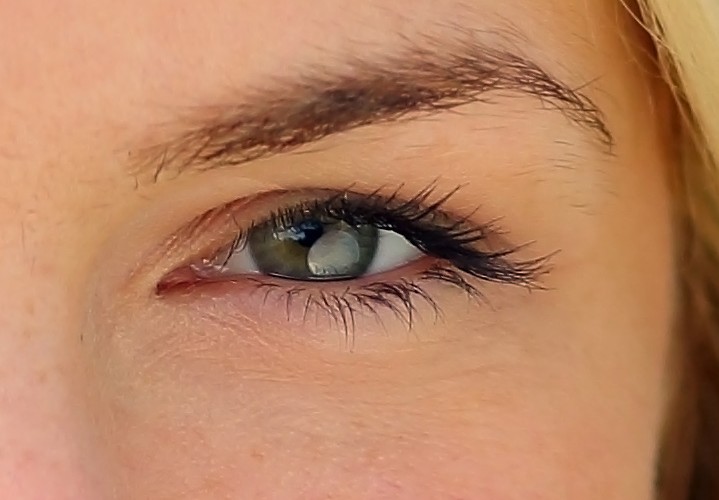
Be conscious of the height of your bounce. If you are too low, you can create odd shadows, especially when the source is a hard light. If you are too high, the eyes can be lost to shadow. The goal is usually to light up the eyes, avoid too much light under the chin, and see the reflector in the iris of the eyes.
Just like regular lights, moving the bounce toward or away from the subject will increase or decrease the amount of light they receive. Moving the source closer also has the effect of softening the light, and creating a larger reflection in the eyes (or other specular surfaces).
Learning by doing
You can read all about how to bounce light, but the easiest way to learn is to get out there and try it yourself! Don’t forget, when you’re using a reflector or board, they can turn into a safety hazard if you’re not careful. They can become sails in high wind and can hurt people if they are mounted improperly. Always practice safe grip.
Have a favorite way to use bounce light? Sound off in the comments below!
Posted by Jon Kline